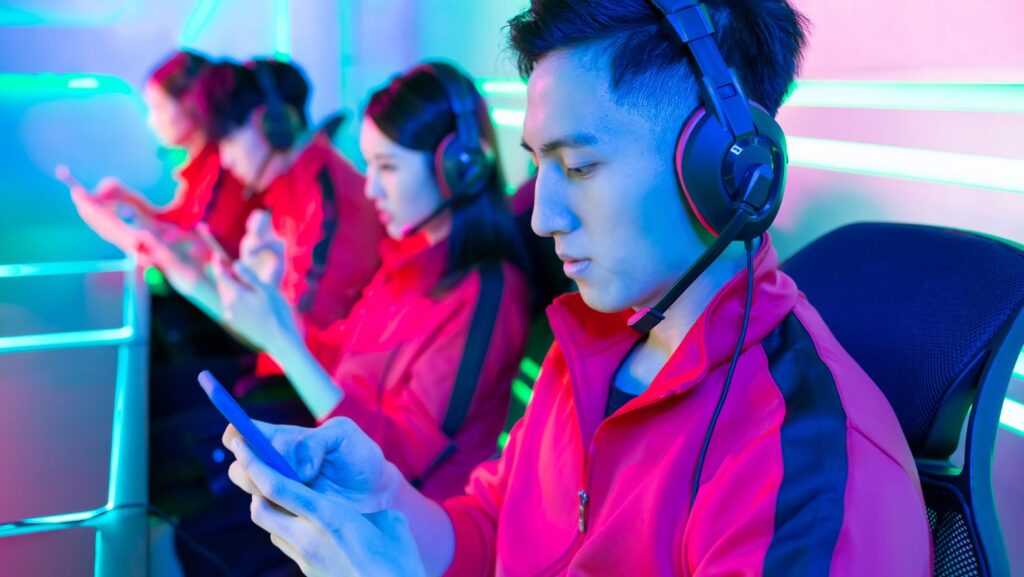
Your squad can’t clutch the round if they can’t hear your callouts. That enemy footstep audio you picked up means nothing if your mic sounds like you’re underwater in a windstorm. In 2026, gaming audio isn’t just about what you hear, it’s about what your teammates, viewers, and opponents hear from you.
Whether you’re grinding ranked matches, streaming to a growing audience, or just hanging out in Discord, your microphone is the bridge between your brain and your team’s strategy. A quality gaming mic eliminates the robotic echo, the keyboard clatter, and the dog barking three rooms away. It turns communication from a liability into an advantage.
This guide breaks down everything you need to know about gaming microphones in 2026: types, features, budget tiers, and real-world scenarios. No marketing fluff, no affiliate spam, just the intel you need to pick the right mic for your setup.
Key Takeaways
- Gaming mics directly impact competitive performance, streaming quality, and team communication—they’re the bridge between your callouts and your teammates’ ability to execute strategy.
- USB microphones like the HyperX QuadCast S and Elgato Wave:3 offer the best value for most gamers, balancing audio quality, ease of setup, and performance without the complexity of XLR interfaces.
- Proper mic placement at 3-6 inches from your mouth with cardioid pickup pattern, combined with software noise suppression, eliminates background noise and delivers clear, professional-sounding voice for any gaming scenario.
- XLR setups (Shure SM7B or Electro-Voice RE20) deliver broadcast-quality audio for serious streamers, but require audio interfaces and cost $250+, making them unnecessary for casual or competitive-only gaming.
- Budget gaming mics like the Fifine K669B ($30-35) provide exceptional value and dramatically outperform laptop and headset microphones, making them ideal for casual Discord and ranked play.
- A complete gaming mic setup includes a boom arm, pop filter, shock mount, and proper software configuration—these accessories maximize audio quality and are essential for content creators and streamers.
Why Your Gaming Mic Matters More Than You Think
Audio quality directly impacts win rates in competitive games. When you’re playing tactical shooters like Valorant or Rainbow Six Siege, delayed or garbled callouts can cost rounds. Your teammates need to hear “one low heaven” instantly and clearly, not struggle to decode static-filled mumbling.
Beyond competitive play, streaming and content creation demand broadcast-quality audio. Viewers will tolerate average webcam quality, but they’ll click away from streams with harsh, peaking audio or constant background noise. Twitch and YouTube’s 2026 algorithms also factor audio quality into discoverability metrics, platforms actively demote streams with poor sound.
Even casual gaming benefits from a solid mic. Discord servers, party chat, and in-game comms are social spaces. Nobody wants to be “that guy” who sounds like they’re broadcasting from a tin can. A decent microphone improves the experience for everyone in the channel, and you’ll notice people actually want to team up with you more often.
Most gamers underestimate how much their default setup is holding them back. Laptop mics, cheap headset boom mics, and ancient USB dongles introduce latency, pick up every keystroke, and reproduce voices with all the warmth of a robot reading tax forms. Upgrading your mic is one of the highest ROI moves you can make for your gaming setup.
Types of Gaming Microphones Explained
USB Microphones: Plug-and-Play Convenience
USB microphones connect directly to your PC or console via USB-A or USB-C, requiring zero additional hardware. They handle analog-to-digital conversion internally, so you’re not relying on your motherboard’s sound processing. Most USB mics work instantly on Windows, macOS, and even PS5/Xbox Series consoles with firmware updates.
These are the sweet spot for most gamers. You get significantly better audio than headset mics without the complexity of audio interfaces or phantom power. Popular models like the HyperX QuadCast S, Blue Yeti X, and Elgato Wave:3 dominate the streaming space because they balance quality and simplicity.
The limitation? USB mics max out around the $200-250 range in terms of audio fidelity. You’re paying for the built-in preamp and ADC, which can’t match dedicated audio interfaces paired with XLR mics. Latency is typically under 10ms on modern USB mics, imperceptible for gaming but worth checking reviews if you’re doing music production on the side.
XLR Microphones: Professional-Grade Audio
XLR microphones require an audio interface or mixer to connect to your PC, adding cost and complexity. But the audio quality ceiling is far higher. XLR mics like the Shure SM7B, Electro-Voice RE20, and Audio-Technica AT2035 are broadcast standards for a reason, they capture voice with warmth, clarity, and dynamic range that USB mics can’t touch.
You’ll need to budget for an interface (Focusrite Scarlett Solo, GoXLR, or similar) and potentially a Cloudlifter if you’re running a low-output mic like the SM7B. Total investment starts around $250 and scales up past $600 for pro setups. This route makes sense if you’re serious about streaming, podcasting, or content creation where audio is a primary differentiator.
XLR setups also offer upgrade flexibility. You can swap mics, add compressors, or route multiple inputs through a mixer. Many esports pros and full-time streamers run XLR rigs because the audio quality is noticeably superior on stream, and viewers absolutely notice the difference.
Headset Microphones: All-in-One Solutions
Headset microphones are built into gaming headsets, combining audio output and input in one device. They’re the default for console gamers and PC players who prefer simplicity. Modern gaming headsets like the SteelSeries Arctis Nova Pro, HyperX Cloud Alpha Wireless, and Razer BlackShark V2 Pro have dramatically improved mic quality over older generations.
That said, even the best headset mics still lag behind standalone options. Physics is the enemy here, cramming a mic into a headset arm with limited space for the capsule and no room for shock mounting means you’re picking up more vibration, handling noise, and mouth plosives. They’re fine for ranked queues and casual Discord, but they won’t cut it for streaming or content where audio quality matters.
The convenience factor is real, though. One USB connection (or wireless dongle) handles your entire audio setup. For competitive gamers who prioritize low latency and positional audio over broadcast quality, a premium headset mic is often good enough.
Lavalier and Clip-On Mics: Compact Alternatives
Lavalier mics (lav mics) clip onto your shirt and are typically used in video production, but some gamers adopt them for ultra-clean desk aesthetics or VR gaming where headset mics don’t work well. The Rode Wireless GO II and DJI Mic are popular wireless options that connect to your PC via USB receiver.
They’re not ideal for traditional gaming setups. Lav mics pick up more clothing rustle and require careful placement to avoid muffled audio. But if you’re streaming VR titles or doing live gameplay with a webcam where you’re moving around, a wireless lav keeps your audio consistent without a boom arm in the frame.
Key Features to Look for in a Gaming Mic
Audio Quality and Frequency Response
Frequency response determines which parts of the audio spectrum your mic captures. Human voice sits roughly between 80 Hz and 8 kHz, so gaming mics should have flat or slightly boosted response in that range. Many USB mics like the Elgato Wave:3 feature frequency responses of 70 Hz to 20 kHz, capturing full vocal warmth without muddiness.
Sample rate and bit depth matter for recording, less so for live comms. Most gaming mics operate at 48 kHz / 16-bit (CD quality) or 96 kHz / 24-bit for streamers. Unless you’re post-processing audio heavily, 48/16 is perfectly fine. Higher specs are marketing more than functional upgrades for gaming.
Sensitivity determines how much gain the mic needs to capture your voice clearly. High-sensitivity mics pick up quieter sounds, which sounds good until you realize they’re also picking up your roommate’s TV through the wall. Medium sensitivity with good gain control is the sweet spot for gaming environments.
Pickup Patterns: Cardioid, Omnidirectional, and Bidirectional
Cardioid is the default for gaming. It captures sound from the front while rejecting noise from the sides and rear. This isolates your voice and minimizes keyboard clatter, mouse clicks, and background noise. The Blue Yeti, HyperX QuadCast, and most streaming mics feature cardioid as their primary or only mode.
Omnidirectional picks up sound equally from all directions. It’s useful for recording a group of people around a table but terrible for gaming, it’ll capture every fan, every Discord notification from your speakers, and every dog bark in the neighborhood.
Bidirectional (figure-8) captures front and back while rejecting the sides. It’s designed for interviews or podcasts with two people facing each other. Some multi-pattern mics include it, but you’ll rarely use it for gaming.
Many USB mics offer switchable patterns. The Blue Yeti and Yeti X have four modes (cardioid, stereo, omni, bidirectional). Stick with cardioid 99% of the time unless you’re doing something specific like recording room audio for a YouTube sketch.
Noise Cancellation and Background Suppression
Hardware noise rejection comes from pickup pattern and microphone design. A tight cardioid pattern physically blocks sound from certain directions. Some mics like the Shure MV7 feature internal DSP that suppresses background noise before the signal even reaches your PC.
Software noise suppression has improved massively in 2026. NVIDIA RTX Voice (now called NVIDIA Broadcast) uses AI to filter out background noise in real-time with minimal CPU impact. Krisp, Discord’s native noise suppression, and OBS’s noise gate filters all work well. Modern gaming rigs can run these tools without performance hits.
The best setup layers both. A cardioid mic pointed at your face with 3-6 inches of distance, combined with software noise suppression, eliminates virtually all background sound. Professional streamers often reference detailed mic testing metrics when comparing background rejection across models.
Build Quality and Durability
Metal construction beats plastic every time. The Elgato Wave:3’s die-cast body, the Shure SM7B’s tank-like build, and the Rode PodMic’s steel grille all survive years of daily use without creaking or developing rattles. Cheaper mics use plastic enclosures that crack or develop loose connections after 12-18 months.
Shock mounting matters more than most gamers realize. Internal or external shock mounts isolate the mic capsule from vibrations transmitted through your desk, keyboard typing, mouse movements, fist-pounding after a bad play. Without proper shock mounting, every keystroke broadcasts to your team.
Cable quality is a sleeper issue. Cheap USB cables develop intermittent connections, causing audio dropouts mid-match. Detachable cables (like on the HyperX QuadCast S or Shure MV7) let you replace a faulty cable without replacing the entire mic.
Top Gaming Microphones by Budget
Budget-Friendly Options Under $50
The Fifine K669B ($30-35) is the king of budget USB mics. It’s a condenser mic with cardioid pattern, metal construction, and a desktop stand. Audio quality punches above its price, significantly better than any headset mic under $100. It lacks features like mute buttons or gain control, but for pure voice clarity in Discord or ranked matches, it’s unbeatable at this price.
Razer Seiren Mini ($40-50) offers a more polished experience with Razer’s ecosystem integration. It’s ultra-compact, features a built-in shock mount, and sounds clean for streams or recordings. The supercardioid pattern is tighter than most budget mics, reducing background noise. The lack of a headphone jack for monitoring is the main drawback.
TONOR TC30 ($35-40) includes a boom arm and pop filter in the box, giving you a complete budget streaming setup. The mic itself is decent, not amazing, but a massive upgrade from built-in options. It’s a solid starter package if you’re setting up your first stream rig.
At this tier, you’re compromising on features, not core audio quality. These mics won’t have RGB, software control, or multiple pickup patterns, but they’ll make your voice clear and intelligible.
Mid-Range Performers ($50-$150)
HyperX QuadCast S ($150) dominates this category. It’s a USB condenser with four pickup patterns, built-in shock mount, tap-to-mute, gain control, and customizable RGB lighting. The audio quality is excellent for streaming, warm, clear, and with good off-axis rejection. It’s plug-and-play on PC and consoles, and the built-in pop filter reduces plosives without needing external accessories.
Elgato Wave:3 ($130-150) is the streamer’s choice. The Clipguard technology prevents audio peaking even if you scream during a clutch play, and the Wave Link software gives you mixer-style control over audio routing. It integrates beautifully with OBS and Streamlabs, making it ideal for content creators who want granular control.
Blue Yeti X ($120-140) remains relevant in 2026 even though being an older design. The four-capsule array delivers excellent audio quality, and the four pickup patterns (cardioid, stereo, omni, bidirectional) offer flexibility. The included Blue VO.CE effects (available via Logitech G Hub) add compression, EQ, and noise reduction. It’s bulky and picks up vibration easily, so budget for a boom arm and shock mount.
Shure MV7 ($200-250, technically premium but often on sale) bridges USB and XLR worlds. It works as a USB mic out of the box but also has an XLR output for future upgrades. The internal DSP handles noise reduction and EQ, and it’s built like a tank. It’s the long-term investment mic for gamers who plan to take streaming seriously.
Premium Picks for Serious Streamers ($150+)
Shure SM7B ($400) + Focusrite Scarlett Solo ($120) + Cloudlifter CL-1 ($150) = $670 total. This is the broadcast standard. If you’ve watched any major Twitch streamer, you’ve heard this mic. It captures voice with incredible warmth and clarity, rejects background noise aggressively, and looks professional on camera. The setup complexity and cost are barriers, but the audio quality is unmatched.
Electro-Voice RE20 ($450) is the radio broadcasting workhorse. It’s similar to the SM7B in quality but has higher output (no Cloudlifter needed) and a different tonal character, slightly brighter, which some voices prefer. It requires an XLR interface and proper boom arm due to its weight.
Rode PodMic ($100) + GoXLR Mini ($250) is a popular combo for streamers who want XLR quality plus mixer functionality. The PodMic is a dynamic cardioid designed for close-talk podcasting and streaming. The GoXLR Mini gives you faders, voice effects, and routing controls. Total cost around $350, delivering near-professional audio with stream-focused features.
Neumann U87 ($3,600) is overkill for gaming but exists in professional content creation studios. If you’re running a multi-person podcast or producing music alongside gaming content, it’s the gold standard. For pure gaming? Completely unnecessary.
At the premium tier, you’re paying for diminishing returns. The jump from $50 to $150 is night and day. The jump from $150 to $400+ is noticeable but not transformative unless your audience is listening on high-end audio equipment.
Best Mics for Different Gaming Scenarios
Competitive Gaming and Esports
Competitive players prioritize communication clarity and low latency over audio fidelity. You don’t need a $400 XLR mic to call out rotations in CS2 or Valorant, you need something that captures your voice clearly without distorting during clutch callouts.
HyperX QuadCast S or Elgato Wave:3 are ideal here. Both deliver clear, intelligible audio with minimal latency (under 10ms), and their cardioid patterns isolate your voice from mechanical keyboard spam. The tap-to-mute on the QuadCast is faster than software toggles, letting you mute instantly between rounds.
Many esports professionals actually use premium headset mics like those on the Logitech G Pro X 2 Lightspeed or SteelSeries Arctis Nova Pro Wireless for competition. The integrated setup reduces points of failure, and the mics are good enough for team comms. Some competitive players check pro player audio configs to see what gear top-tier players run in tournaments.
Dynamic mics like the Shure MV7 or Rode PodMic are overkill for pure competitive play but work great if you also stream your ranked sessions. They handle high sound pressure levels without distorting, so rage-screaming after a bad play won’t blow out your team’s eardrums.
Streaming and Content Creation
Streamers need broadcast-quality audio because viewers directly compare your stream to everyone else on the platform. Poor audio is the fastest way to lose viewers, people will tolerate 720p video but not harsh, peaking audio or constant background noise.
Shure SM7B or Electro-Voice RE20 setups are the gold standard. They deliver the warm, radio-quality voice that makes streams feel professional. Pair them with an interface like the GoXLR or Focusrite Scarlett 2i2, and you have full control over EQ, compression, and routing.
If you’re not ready for XLR, the Elgato Wave:3 is the best USB option for streamers. The Wave Link software lets you create separate audio channels for game sound, Discord, music, and mic, giving you mixer-level control without the hardware cost. The Clipguard tech prevents audio peaking during high-energy moments.
Blue Yeti X remains popular for beginner streamers due to name recognition and included software effects. It’s a solid choice but requires careful placement and a boom arm to avoid picking up desk vibrations. The multi-pattern capability is useful if you occasionally do podcast-style content with a guest.
YouTubers and video creators should consider XLR mics even if they’re not streaming. The audio quality improvement in recorded content is substantial, and you’re not constrained by USB’s latency considerations since you’re recording locally.
Casual Gaming and Voice Chat
Casual players just need clear comms for Discord, party chat, or in-game voice. You’re not worried about stream quality or competitive callouts, you just want your friends to hear you without static or background noise.
Fifine K669B ($30-35) is perfect here. It’s cheap, sounds way better than laptop mics or budget headsets, and requires zero setup. Plug it in, set your input in Discord, and you’re done. Your friends will immediately comment on how much better you sound.
Razer Seiren Mini ($40-50) is great for casual gamers who want something compact that doesn’t dominate their desk. It’s small enough to tuck behind a monitor when not in use but delivers clear audio for voice chat.
If you prefer the all-in-one convenience of a headset, modern options like the HyperX Cloud Alpha or SteelSeries Arctis 7+ have improved mic quality enough for casual use. They’re not as good as standalone mics, but they’re “good enough” if you’re not streaming or competing seriously.
Many casual gamers overlook how much a basic USB mic improves the social experience. Nobody wants to squad up with the person whose mic sounds like they’re in a wind tunnel. A $30-50 investment makes you a more pleasant teammate.
Setting Up Your Gaming Mic for Optimal Performance
Proper Microphone Placement and Positioning
Mic distance determines how your voice sounds and how much background noise gets picked up. The sweet spot for most cardioid mics is 3-6 inches from your mouth, slightly off to the side (not directly in front) to avoid plosives (hard P and B sounds).
Closer than 3 inches creates proximity effect, excessive bass and muddy sound. It also increases the chance of plosive pops and breath sounds. Farther than 6 inches forces you to crank the gain, which increases background noise pickup.
Mic height should position the capsule roughly level with your mouth or angled slightly upward. Pointing a mic upward from below your chin captures more mouth sounds and less chest resonance, making your voice sound thinner. Pointing down from above captures more nasal tones.
Boom arms are essential for proper positioning. Desktop stands force you to work around the mic instead of positioning the mic around you. The Rode PSA1+ ($100) and Blue Compass ($100) are premium options, while Amazon Basics and Neewer arms ($15-30) work fine for lighter mics.
Avoid placing your mic between you and your keyboard. Every keystroke will transmit vibration through your desk into the mic stand, creating a constant thumping on your audio. Position the mic to the side or mount it from a wall-mounted arm to isolate it from desk vibrations.
Software Settings and Audio Configuration
Gain control is your first adjustment. Set gain so your normal speaking voice peaks around -12 dB to -6 dB in your recording software or Discord’s input meter. Too low and you’re fighting noise floor: too high and you’ll peak/distort when you get excited during gameplay.
Most USB mics have hardware gain knobs. Start at 50%, talk normally, and adjust up or down until you’re in the green zone. XLR setups control gain via the interface, same principle applies.
Discord settings matter as much as mic hardware. Navigate to User Settings > Voice & Video and configure:
- Input Device: Select your mic
- Input Volume: Adjust so the green bar reaches 2/3 to 3/4 during normal speech
- Noise Suppression: Enable Krisp (Discord’s AI noise cancellation)
- Echo Cancellation: Enable if using speakers: disable if using headphones
- Automatic Gain Control: Disable (it creates weird volume fluctuations)
OBS settings for streamers: Use the same mic as a single audio source. Add a Noise Suppression filter (RNNoise or NVIDIA Broadcast if you have an RTX GPU), a Noise Gate to cut audio below -40 dB when you’re not talking, and a Compressor to even out volume fluctuations.
Windows audio settings should have mic boost disabled and exclusive mode enabled. Mic boost adds unnecessary gain that introduces noise. Exclusive mode lets applications take full control of the audio device for better quality and lower latency. Gamers looking to fine-tune their entire setup often reference comprehensive setup tutorials for platform-specific optimizations.
Using Pop Filters and Shock Mounts
Pop filters are essential for any mic without a built-in windscreen. They disperse the air from plosive sounds (P, B, T) before it hits the mic capsule, preventing the harsh popping sound that’s jarring to listeners.
Foam windscreens (like the one included with the Shure SM7B) work but are less effective than dual-layer mesh pop filters. Position the pop filter 2-3 inches in front of the mic capsule. They cost $10-20 and make a noticeable difference.
Shock mounts isolate the mic from vibrations transmitted through the boom arm and desk. Even if you’re using a boom arm, desk vibrations travel through the mount. A good shock mount uses elastic bands or suspension to decouple the mic from the stand.
Many mics include shock mounts (HyperX QuadCast S, Elgato Wave:3), but cheaper mics often don’t. Universal shock mounts like the Rode PSM1 ($40) or Neewer options ($15-20) fit most standard-threaded mics.
XLR mics like the Shure SM7B or Rode PodMic have integrated internal shock mounting, reducing the need for external suspension. USB mics vary, check whether your model includes this feature before buying additional accessories.
Common Gaming Mic Problems and Solutions
Static or white noise: Usually caused by gain set too high or electrical interference. Lower your gain settings first. If that doesn’t fix it, try a different USB port, ports sharing a bus with other high-power devices can introduce noise. For XLR setups, check your cables for damage and ensure phantom power is stable.
Echo or feedback: Happens when your mic picks up audio from your speakers. Switch to headphones, or enable Discord’s echo cancellation. Some gamers run speakers and use software like NVIDIA Broadcast to filter out system audio, but headphones are the reliable fix.
Distorted or peaking audio: You’re either too close to the mic or gain is too high. Back up to 4-6 inches and reduce gain until peaks stay below -6 dB. Some mics like the Elgato Wave:3 have built-in peak limiting (Clipguard) that prevents this automatically.
Mic not recognized: Try a different USB port. USB 3.0 ports (blue) sometimes cause issues with audio devices, use USB 2.0 (black) instead. Update your audio drivers from the manufacturer’s website, not Windows Update. For XLR mics, ensure phantom power is enabled on your interface if the mic requires it (condensers do, dynamics don’t).
Background noise pickup: Switch to cardioid pickup pattern if your mic has multiple modes. Enable noise suppression in Discord or use NVIDIA Broadcast. Move the mic closer to your mouth so you can lower the gain, reducing background sensitivity. Check for environmental noise sources, fans, AC, PC exhaust, and reposition the mic or noise sources if possible.
Robotic or underwater sound: Usually a sample rate mismatch. Windows is set to 48 kHz but your mic is running at 44.1 kHz (or vice versa). Go to Windows Sound Settings > Device Properties > Additional Device Properties > Advanced, and match the sample rate to your mic’s native rate (usually 48 kHz).
Volume fluctuations: Disable automatic gain control in Windows and Discord. AGC tries to keep volume consistent but creates weird artifacts. Use a compressor in OBS instead if you need volume leveling for streams.
USB disconnects or dropouts: Replace your USB cable if possible (mics with detachable cables). Some cheaper cables have intermittent connections. Disable USB selective suspend in Windows power settings, it puts USB devices to sleep, causing dropouts.
Gaming Mic Accessories Worth Considering
Boom arms transform mic usability. The Rode PSA1+ ($100) is the premium choice, all-metal construction, cable management, and supports up to 2.4 lbs. The Blue Compass ($100) is similar quality. Budget options like Neewer NW-35 ($20-25) or InnoGear ($15) work fine for lighter USB mics under 1 lb.
Boom arms free up desk space, position the mic optimally, and isolate it from desk vibrations. The convenience of swinging the mic out of the way when not in use is underrated, your mic isn’t constantly in frame or in the way of your monitor.
Pop filters are essential unless your mic includes a built-in windscreen. The Aokeo Professional ($13) and Stedman Proscreen XL ($50) both work well. Metal mesh filters last longer than nylon but cost more. Position them 2-3 inches in front of the mic capsule.
Shock mounts reduce vibration if your mic doesn’t include internal shock mounting. The Rode PSM1 ($40) fits most standard-threaded mics. Universal options from Neewer and InnoGear ($15-20) work for lighter mics.
Audio interfaces unlock XLR mics. The Focusrite Scarlett Solo ($120) and Scarlett 2i2 ($180) are industry standards, clean preamps, low latency, and rock-solid drivers. The GoXLR Mini ($250) adds mixer functionality with faders, voice effects, and routing controls, making it ideal for streamers.
Cloudlifter CL-1 ($150) boosts low-output dynamic mics like the Shure SM7B. It’s inline phantom-powered gain that adds 25 dB of clean boost, letting you run the SM7B without cranking your interface preamp into noise territory.
Headphone amplifiers matter if you’re monitoring your audio through the mic’s headphone jack. Many USB mics have weak headphone amps that can’t drive high-impedance headphones properly. A dedicated amp like the Schiit Magni ($100) or JDS Labs Atom ($100) provides clean, powerful output.
Cable management keeps your setup clean. Velcro cable ties, adhesive cable clips, and sleeves route cables along boom arms and desks without visual clutter. It’s a small detail but makes your streaming setup look intentional rather than chaotic.
Conclusion
Your mic is the most underrated piece of gaming gear. It doesn’t boost your FPS, lower your input lag, or improve your aim, but it makes you a better teammate, a more watchable streamer, and a more pleasant person to game with.
The right mic depends on your use case and budget. Competitive players need clarity and low latency. Streamers need broadcast-quality audio that keeps viewers engaged. Casual gamers just need something better than a laptop mic or 2018-era headset boom.
You don’t need to drop $600 on an XLR setup to sound good. A $30 Fifine K669B is a massive upgrade for casual use. A $150 HyperX QuadCast S handles streaming and competitive gaming without compromise. The Shure SM7B is the endgame if you’re building a career around content creation.
Set it up properly, 3-6 inches from your mouth, cardioid pattern, moderate gain, noise suppression enabled. Add a boom arm and pop filter. Test your audio in Discord or OBS before you go live.
Your teammates will thank you. Your viewers will stick around longer. And you’ll finally stop being the person everyone mutes.